Friday, February 20, 2015

Deliciously Decadent Banana Coconut Upside Down Cake


Banana Coconut Upside Down Cake

Here's an interesting twist on the classic Upside Down Cake. This easy to make buttery rich, caramely banana coconut take this yellow cake to new heights. Just so damn deliciously decadent!

Banana Coconut Upside Down Cake  
Ingredients
  • 1 BettyCrocker yellow cake mix
  • 3 whole eggs
  • 1/4 cup oil
  • 1/2 cup sour cream
  • 1/2 cup water
  • 6 bananas sliced 1/4 inch thick
  • 1 1/2 cups shredded coconut
  • 1 cup packed brown sugar
  • 1/2 cup butter, divided
  • 2 Tablespoons lemon juice

Directions Here.>


    Photo/Source: tablespoon

    You Might Also Like


    Enhanced by Zemanta

    Wednesday, February 18, 2015

    DIY Pedicure: Exfoliating Foot Bath

    DIY EXFO FOOT BATH 
    This simple at-home spa milk foot bath will save you time and money, to keep feet smooth, hydrated and youthful-looking.
    The lactic acid in the milk helps slough off dead layers of skin, smoothing calluses away, while the essential oils calm the skin and soothe soreness or inflammation.
    like 
    Mix the milk, hot water and a few drops of essential oil in a bowl that fits your feet. Soak feet for 5-10 minutes. Once your feet have finished soaking, use any one of these sugar scrubs DIY: Red Wine Sugar Scrub, DIY Lemon Sugar Scrub or mix together, equal parts brown sugar and olive oil mixture to exfoliate the loosened skin from your feet. Rinse your feet clean before drying and moisturize with a rich moisturizing foot cream.


    You Might Also Like


    Thursday, December 18, 2014

    The Top 10 DIY Posts of 2014 from Keitochan Says:

    Top 10 DIY Posts of 2014 from Keitochan Says:

    1. DIY: 3 Papaya Face Mask Recipes for Bright Glowing Skin

    papaya-2Papaya is a good source of Vitamin A and papain. Vitamin A acts as an anti-oxidant, while the papain breaks down inactive proteins and removes dead skin cells. The best feature of the fruit is its low sodium quality.Since the salt content is less, the water retention is also little. The result is an overall hydrated skin.

    2. DIY: Detoxifying Caffeine Body Scrub

    coffee beans
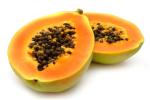
This Detoxifying Caffeine scrub helps smooth away cellulite and get rid of the orange dimpled look by the caffeine in the coffee grounds constricting blood vessels so that the skin appears tighter, firmer and smoother.

    3. DIY: Homemade Moist Heat Packs

    Moist heat packs are filled with moisture-absorbing grain that draws moisture from the air and re-circulates it deep into sore muscles. Moist heat is the best way to sooth many types of pain, penetrating deep into sore muscles. It alleviates joint stiffness, muscle spasms, tight muscles and arthritis pain with soothing heat that helps you feel better.

    4. DIY: Homemade Bubble Bath, Detoxifying & Stress Reliving Bath Salts

    Bubble-bath-537x376Learn how to make your own homemade bath and body products to give as gifts or make for yourself. The natural alternative to commercial products that contain preservatives and other unwanted chemicals. Here, you’ll find a collection of my natural handmade bath and body recipes from inhabitat.com.

    5. DIY: Homemade Fruit & Vegetable Wash

    Did you know fruits and vegetables, even organic can have an alarming amount of pesticides and bacteria on their surface? Using this homemade all-natural fruit and vegetable wash has the combined acidity of vinegar and lemon juice, which kills bacteria, removes pesticide residue and helps dissolve the waxy coating found on most produce. Washing with plain water alone will not remove.

    like 

    6. DIY NATURAL FACE LIFT: Egg White Face Mask to Shrink Large Pores & Firm Skin

    eggs
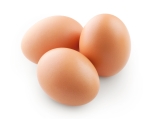
SHRINK LARGE PORES AND FIRM SKIN with egg white and corn starch. Egg white face mask is a natural way to tighten the pores while giving you a temporary facelift. The egg whites contain astringent properties that can pull out impurities and tighten pores as it dries. This nourishing natural skincare treatments is suitable for all skin types and it is a miracle treatment for wrinkle’s acne blackheads and other skin ailments.

    7. DIY: All Natural Sore Muscle Rub

    This homemade muscle rub penetrates deep into the muscles, bringing a soothing and relaxing sensation.

    8. DIY Lemon Sugar Scrub

    This DIY Lemon Sugar Scrub is the perfect inexpensive gift idea for any occasion. Just a few simple ingredients to make a basic sugar scrub, your oil of choice, sugar, and oil extract to scent your scrub.

    9. DIY: Red Wine Sugar Scrub

    Red WineThis scrub made with red wine is an excellent addition to your beauty rituals. The sugar gently exfoliates the skin, honey moisturizes and soothes dry skin. The red wine will improve blood circulation to give you healthy skin.

    10. 3 DIY Ways To Make Homemade Fabreze + Fabric Wrinkle-Release

    I love Febreze and I use it on everything around the house from fabric to shoes to carpets, but we all know how expensive it can be. Here are 3 recipes you can make at home for as little as .15 per bottle that not only tackle odors, but de-wrinkle too.

    Saturday, December 6, 2014

    DIY: Nourishing Sesame Rice Face & Body Polish

    DIY Sesame rice scrub 
    This nourishing sesame rice face & body polish is one of the simplest DIY home remedies to get your skin glow instantly. While the sesame nourishes and moisturizes your skin, the rice grains will exfoliate gently.

    e596e3cb32df42ca9030d5c765fe5061

    A new social media platform that pays you for the content you post. Click Here To Join.

    Ingredients
    The full directions over at Keitochan Says:

    You Might Also Like


    Friday, November 28, 2014

    Turkey 101: How To Guide To Thanksgiving Dinner Success, Plus The Perfect Roast Turkey Recipe

    open-uri20141120-153-1srm6bf 
    A great thought-provoking way to connect with your guest at your Thanksgiving get together. Instead of using the usual placemats; reuse a paper bag cut to the size of a placemat. Have your guest jot down what their thankful for and share.

    One: Choose the size.

    Allow 1-2 pounds per adult for turkeys over 12 pounds.

    Two: Thawing the Turkey.

    Allow 24 hours in the refrigerator for every 5 pounds of turkey, so a 15 pound turkey will take 3 to 4 days to thaw. You can also thaw the turkey under cold running water, not warm, changing the water every 30 minutes and allowing 30 minutes per pound to thaw.

    Three: Cleaning the Turkey.

    Don’t rinse the turkey because bacteria can spread around the kitchen. Instead, thoroughly pat dry the turkey with paper towels. Don’t forget to remove the gizzard packet before stuffing the turkey.

    Four: Stuffing the Turkey.

    Never stuff your turkey ahead of time. It should be stuffed when it's ready to go into the oven the stuffing should be spooned light lean into the turkey’s body cavity and neck cavity. Do not packet they internal temperature of the turkey must reach 165°F and if the stuffing is too lightly pat the interior won’t get hot enough.

    Five: Carving the Turkey.

    • Step one: Place the turkey on a large cutting board.
    • Step two: Remove the leg portion by pulling the drumstick away from the body and cutting the joints between the thighs and the body.
    • Step Three: Half the turkey by slicing down the middle and carving the breast away from the breast bone and the rib cage.
    • Step four: Slice breast half in half pieces across the grain, if desired cut the wings off by cutting at the joints.
    like

    ROAST TURKEY RECIPE

    Ingredients

    Directions

    Spice Rub: Mix the paprika, garlic powder, onion powder, cayenne pepper, 1 tablespoon salt, 1 1/2 teaspoons black pepper and dried thyme, in a bowl. Sprinkle the spice rub inside the cavity and top of the bird. Slide your fingers between the skin and massage part of the rub onto the meat under the skin. Place the turkey on a tray and cover. Refrigerate overnight or up to 24 hours so the flavors can infuse.


    You Might Also Like

    pumpkin pie martini


    #FriendsOfKeitochan Edition No. 14: The Ultimate Guide to Apple Picking

    The Ultimate Guide to Apple Picking

    By Kelly Roberson of fix.com. Thank you for sharing!
    Guide to Picking Apples - How to Pick an Apple Properly 
    Source: Fix.com

    The crunch of fallen leaves, muted blooms of mums, and flickering lights of carved jack-o-lanterns are all autumn mainstays. The abundance of apples is also another welcome sign of fall. Although apples are available year-round, most of the apple crop matures during late summer and early fall. That’s when you’ll find a wider range of varieties to choose from at the grocery store, as well as pick-your-own orchards that offer the ability to sample (and take home) as many fresh apples as you like. [...READ MORE]
    __________________________________________________

    This new feature called Friends of Keitochan is a great way for other bloggers and friends to share a snippet of their stories with Keitochansays.com. It’s just another fun way to grow and connect your audience. Here’s how it works!

    You Might Also Like